
Wednesday, 7 August 2013


3D Development
Here are the progress pictures of how the level was developed.

Firstly, I moddled and textured a few basic assets; the floor, wooden planks and rocks as well as a crate which could populate the area quickly.
I also added 2 lights of different colours to create an atmosphere.
I also added 2 lights of different colours to create an atmosphere.

I then created a simple plant out of 4 planes and started to populate the area. I really wanted to stick with a rayman-esque style of texture and asset, so I kept everything really simple.


More plants were created and I started to develope the second level of the diorama. I continued to create and populate the area.


I wanted to add a brighter, more magical atmosphere, so I added a wall light just to start binging the colour out.


I added a 'netting' as a texture just to increase the character. I'd also added normal maps to the plain assets to spice them up a little and not leave them so flat.


I then expanded the level to the second quarter and added the water inbetween. I made the water self-illuminating as well as added some lights in to make it luminous and magical.

I continued to populate with the assets I'd made and started to add the final bit.
I created textures for water splashing and layed them over the water on individual planes.
Clustered planes also allowed me to create bigger splash effects which jumped off the surface of the water.
I created textures for water splashing and layed them over the water on individual planes.
Clustered planes also allowed me to create bigger splash effects which jumped off the surface of the water.

Finally, I added the rest of the back assets, including a hidden door - a departure from my original idea of having a mask-like fountain. I decided a hidden door would be more appropriate and original around my theme of MASKS as a stone slab is hiding the door from view.

Tuesday, 6 August 2013
Concept art and Design

This is the piece of artwork I've drawn as an environment concept.
I really liked the aztec-y feel of the other work I've done around the theme of MASKs, so I decided to do something similar, unfortunatly, though here I've drawn a statue based upon Aztec masks, I've already exhausted that side of the theme.
So I decided to change the statue so that it was hiding a door, thus the theme 'masks' continues as the statue hides the nature of the area - a secret passageway.
So I decided to change the statue so that it was hiding a door, thus the theme 'masks' continues as the statue hides the nature of the area - a secret passageway.

Rayman Textures
I decided to have a look at Rayman textures in order to see what sort of detail went into them.


The textures are pretty detailed in themselves. There is a shaded, cartoony edge and uses soft edges rather than hard.


Colours are soft and almost pastel. There is a pretty feel which comes from the contrasting colours used in lighting, in the two examples above there is both cool and warm coloured light which adds an environmental variation.
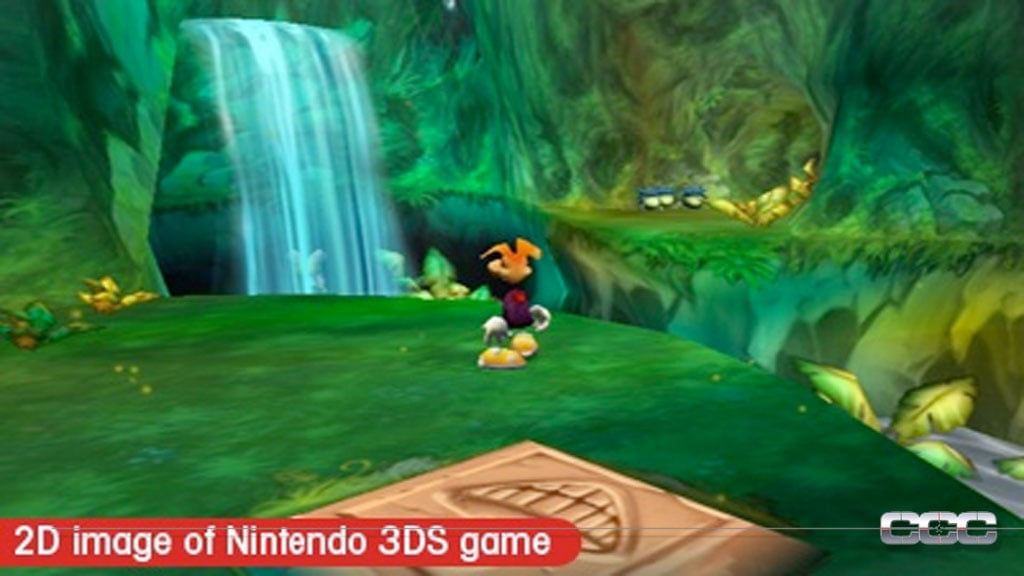
Research - Masks - Rayman, Spyro, Crash Bandicoot
After re-evaluating building my day of the dead themed environment, I decided to create something simpler but something that'd, in my opinion, look much better.
I decided to look at games like Spyro, Rayman and Crash Bandicoot for inspiration to create a low-poly piece.

It's even made a nice transition to the 3DS.


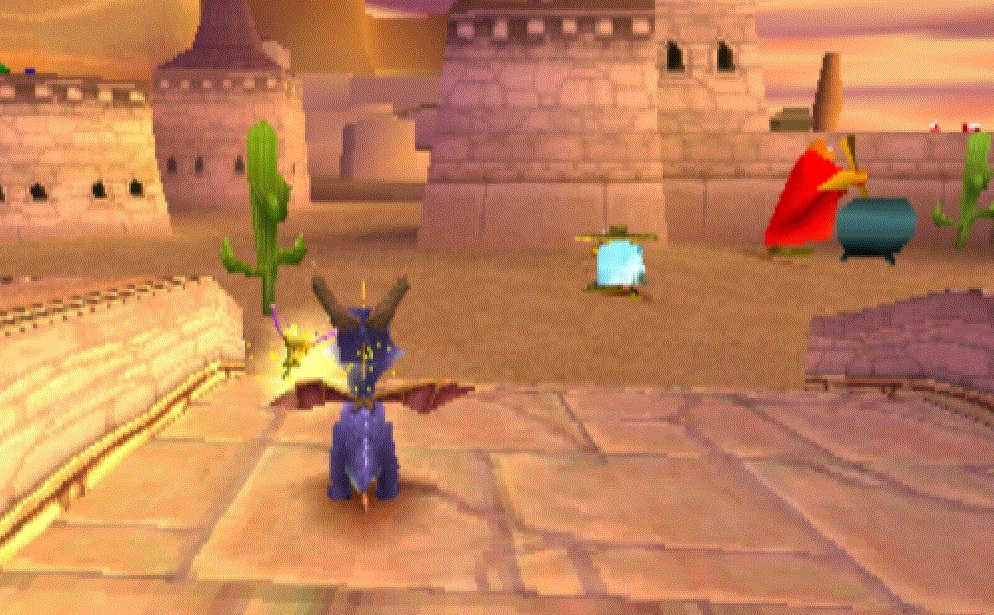


Crash Bandicoot keeps better detail within it's assets rather than Spyro. The colours are more vivid and less pastel. However, some of the textures are pixilated.
Later versions support higher quality textures and assets. They keep a similar style to Rayman, having an interesting juxtaposition and shading of textures to give it a really stylised feel.

Banjo Kazooie 64 is another good example to look at, the textures still retain the level of detail needed to keep the areas interested rather than leaving it up to the assets.


Textures are more my strong suit than modeling, I believe creating something similar to Rayman would allow me to create the best looking work.
Tuesday, 25 June 2013
Finishing the level
To make use of the central space I filled it out with UDK assets to make it more interesting to explore.
 To increase the insenstive to explore I added mask collectibles about the environment-

 The kismet for the masks has a touch trigger which destroys the mask mesh and toggles on a light which is at the end of the level showing which masks were collected.
 To emphasize which masks were collected i made a cut scene that focuses on each of the masks. The ones with a spot light on were collected.


The level is now done, here is how its looking:


The level is now done, here is how its looking:

Monday, 24 June 2013
Level Kismet
Before
starting the Kismet, there were some basic assets needed for the puzzles in my
level design doc. I made a hexagonal pillar and a thin cylinder for a trip wire.
I exported the assets from 3ds Max as FBX files, and then imported them into
UDK using the Content Browser. I imported the assets into the Map package for
the level and applied a basic grey material which is on all the BSP.


The
first puzzle is a maze like structure with trip wires that cause damage to the
player. Three trip wires is what it takes to kill the player so they have to
approach the goal with care.
Here is
a screen grab showing the blocking volumes and tripwire-triggers making up the
puzzle:
I populated the blocking volumes with UDK stock assets:


The platforms that drop the player down all have the same matinee sequence which is reversed is the player hits the trigger that is located on the path back to the puzzle entrance.


Inside is a big glowing wall with masks that animate by coming together and a much larger mask moving through the wall


Subscribe to:
Posts (Atom)